Thursday, July 12, 2012
Dress Season
I'm taking the summer quarter off from classes. I work my butt off during the school year, so trust me, I deserve it. With no school, means more days off, and more days off means more days when i can wear dresses! As I've gotten older, I've discovered that I'm a total girly-girl. I love dresses, cupcakes, Mary Poppins, and knitting. I've compiled a wish list of dresses I've discovered from the internet. Take a look!
Tuesday, July 10, 2012
Science Fiction Party Snacks
Today I hosted a party. It was in honor of my favorite show returning after being off the air for a year and a half. The show is called Destination Truth and it's on the SyFy network. The show is about a group of explorers who travel around the world and search for monsters and urban legends, like Bigfoot or the Loch Ness Monster. I enjoy the show because it gives you a peak at cultures completely different from your own, often in remote parts of the world. I love the suspense and action of the chase, and I LOVE how funny the host, Josh Gates, is. I have a lot of friends who also can't get enough of this show, so I invited them over to watch the season premier with me. Just for kicks, I made some "monster" inspired treats. These aren't "recipes" so much as just ideas, since everything I made was from the quick instructions on the back of the box. Either way, I thought it turned out pretty darn cute, and the show was pretty darn entertaining. Enjoy!
With all this, it turned out to be a pretty cute spread. And even though it was a rather small get-together, we polished off that bread bowl and most of the jello shots. I'll have blue M&Ms and "swamp thing" cupcakes for a while yet though. I'll have to pack some in my lunch tomorrow to take to work. Woo! That's the great thing about party leftovers, their all yours!
If you are curious about the show, you can watch a clip here:
Or full episodes here for free via Hulu.
With all this, it turned out to be a pretty cute spread. And even though it was a rather small get-together, we polished off that bread bowl and most of the jello shots. I'll have blue M&Ms and "swamp thing" cupcakes for a while yet though. I'll have to pack some in my lunch tomorrow to take to work. Woo! That's the great thing about party leftovers, their all yours!
If you are curious about the show, you can watch a clip here:
Or full episodes here for free via Hulu.
Monday, July 9, 2012
Summer Scarf D.I.Y
Do you love to make pretty things? Do you love to wear pretty things? Do you love to save money? Then do I have the project for you!
This DIY will show you how to make a light summer scarf with things you probably already have. Pretty impressive, yes? First we'll make the scarf, then I'll show you how to stamp it.
To make the scarf, all you'll need is a half yard of scrap fabric. Most fabrics are around 52 inches long when unfolded. If you get a half yard, that's 18 inches wide.
You'll need:
A pen and a pencil, or just a pencil.
An image of that you want to transfer. (remember it'll be reversed since you're stamping it.
A rubber stamp blank. (or a big pink eraser.)
Linoleum cutter tools. You can probably use an EX-acto knife if you have one.
I tried using transfer paper but it didn't work for me. The image came out too pale. But when I traced over my image on the paper, it left an indentation on the back. Then all I had to do was to gently rub the back of my image and the graphite collected on the raised parts. I laid it back over the stamp blank and rubbed the graphite over the rubber. It worked! A little pale, but not bad.
Carve away the parts you don' t need... And your stamp is made!!
To stamp it, I laid down some paper on my work surface in case the paint bleeds through, and it did. I used a glass palette. (You can use a cheap junky picture frame from goodwill.) Once you choose your color, lay it out in a flat square, just bigger than your stamp, and STAMP AWAY!
This DIY will show you how to make a light summer scarf with things you probably already have. Pretty impressive, yes? First we'll make the scarf, then I'll show you how to stamp it.
To make the scarf, all you'll need is a half yard of scrap fabric. Most fabrics are around 52 inches long when unfolded. If you get a half yard, that's 18 inches wide.
- Cut it width-ways down the middle, so you have two pieces that are 9 x 52 inches.
- Fold ever, pin and sew each long side of the strips, not the shorter side.
- Grab the one short side on each piece and sew them together, right sides facing in, leaving about an inch flap.
- Fold over the flaps and sew them down.
- Now you have one long, thin piece of fabric.
- At each ends, cut thin strips and tie to create a fringe.
You'll need:
A pen and a pencil, or just a pencil.
An image of that you want to transfer. (remember it'll be reversed since you're stamping it.
A rubber stamp blank. (or a big pink eraser.)
Linoleum cutter tools. You can probably use an EX-acto knife if you have one.
I tried using transfer paper but it didn't work for me. The image came out too pale. But when I traced over my image on the paper, it left an indentation on the back. Then all I had to do was to gently rub the back of my image and the graphite collected on the raised parts. I laid it back over the stamp blank and rubbed the graphite over the rubber. It worked! A little pale, but not bad.
Carve away the parts you don' t need... And your stamp is made!!
To stamp it, I laid down some paper on my work surface in case the paint bleeds through, and it did. I used a glass palette. (You can use a cheap junky picture frame from goodwill.) Once you choose your color, lay it out in a flat square, just bigger than your stamp, and STAMP AWAY!
Saturday, July 7, 2012
The Best Sloths on Etsy
I love sloths. A lot. If you ask me if they're my favorite animal I'd say maybe. I love them all so much, but sloths are definitely in my top 10. (along with kitties, chipmunks, foxes, racoons, sheep... the list goes on and on..) I've composed a little list of my favorite sloths on etsy. I hope you enjoy it! :D
I hope you enjoyed the sloths! Why not check out some of these shops! :D
Mackinac Island, Michigan
So things have been a little crazy around here lately. A storm knocked out my internet on Friday and it was off for several days. Then Monday my family and I left for our vacation to Michigan. Then there was the fourth of July. Then I worked long shifts the next two days. So heeere I am to tell you things should get back to normal around here soon. I have a couple giveaways planned, a few DIYs and some exciting "monster" recipes. Stick around. ;)
Enjoy these snapshots I took on vacation, and look forward to the big ideas I have for my blog in the next coming week!!
Mackinac Island, Mackinaw Michigan
There were no cars allowed on the island. You had to walk, ride a bike, ride a horse, or a horse-drawn-taxi.
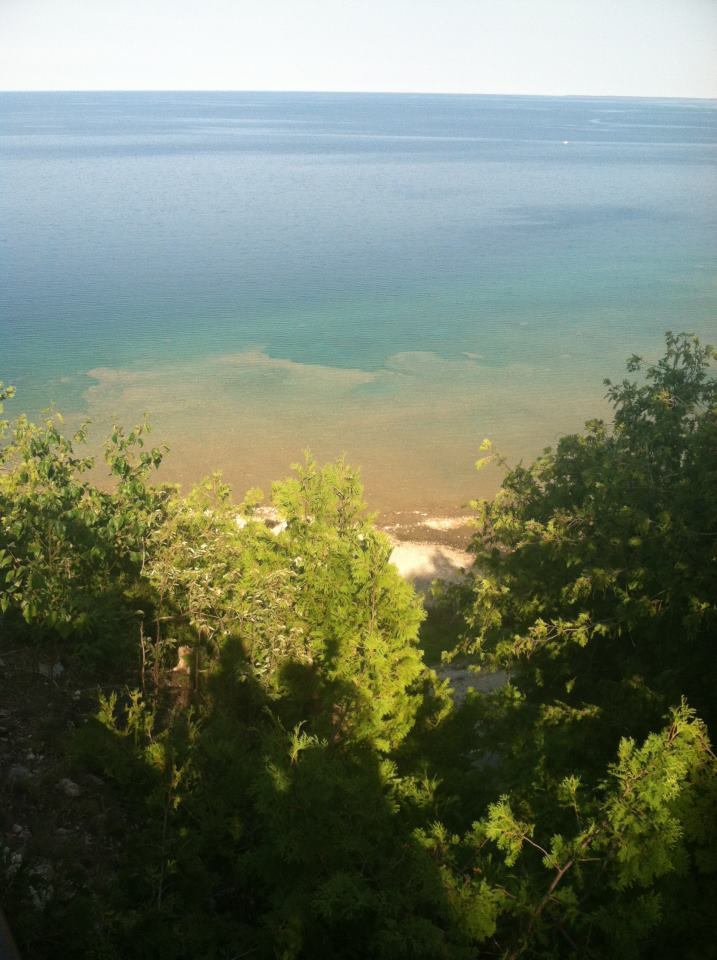
Beautiful lake Huron
You had to take a ferry to get to the island.
I really enjoyed the butterfly house.
There were no shells on the beach, but lots of cool rocks.
Fort Mackinac
As nice as it is to explore places you've never been, it sure feels good to be home!
Enjoy these snapshots I took on vacation, and look forward to the big ideas I have for my blog in the next coming week!!
Mackinac Island, Mackinaw Michigan
There were no cars allowed on the island. You had to walk, ride a bike, ride a horse, or a horse-drawn-taxi.
We crossed over the Mackinaw Bridge into the upper pininsula, just for the heck of it. Then turned around and went back to the mitten.
You had to take a ferry to get to the island.
I really enjoyed the butterfly house.
There were no shells on the beach, but lots of cool rocks.
Fort Mackinac
As nice as it is to explore places you've never been, it sure feels good to be home!
Sunday, July 1, 2012
DIY Fourth of July Headband
Here's a quick and inexpensive DIY on how to make a festive headband for the Fourth of July!
With a pencil, draw stars (or whatever) on the back of the foam sheets. I made mine about 3 inches tall. Cut them out with scissors.
For extra stability, I sewed my stars onto the ribbon. I made my stitches small so they weren't too noticeable. Place it where you want it and tie it on! Use bobby pins if you're afraid it won't stay put, but I've been wearing mine and it hasn't caused me any problems. :)
To everyone in the USA, have a fun and safe fourth of July! I'll be back to Blogging on Thursday, if not sooner! Thanks for reading my blog!
Well this is embarrassing..
Friday night there was a huge storm that knocked out the power to our house. The power is back on now but my Internet is still out. I have a bunch of DIYs and fun art and stuff saved on my laptop and ready to show you, but I can't post it because my only Internet connection is on my phone. :-/
And tomorrow I'm leaving on a family vacation to Michigan and I won't be able to blog again until Thursday. :( I'm really really bummed that I lost a whole freakin week of blogging. umm try to use a friend's wifi today and bring you a little 4th of July DIY, but no guarantee . I haven't abandoned the BEARSHAPED blog, I promise!
I'll leave you with this picture of my cat looking sexy. Hopefully that will tide you over until my next post!! ;)
And tomorrow I'm leaving on a family vacation to Michigan and I won't be able to blog again until Thursday. :( I'm really really bummed that I lost a whole freakin week of blogging. umm try to use a friend's wifi today and bring you a little 4th of July DIY, but no guarantee . I haven't abandoned the BEARSHAPED blog, I promise!
I'll leave you with this picture of my cat looking sexy. Hopefully that will tide you over until my next post!! ;)
Subscribe to:
Posts (Atom)