Well today is June 20th-- the official first day of summer. I wanted to share a little summery DIY with you today. I live in Dayton, Ohio-- a land locked place-- and working part time while going to school, I can't afford to travel. But I can afford is a $3 bag of sea shells from Hobby Lobby and some daydreams of white sand beaches!
In order to make these beachy candles, you'll need:
- I have a "Candle Creations" candle maker that melts and drips my wax, but you can melt it on a stove top pan too, just follow the melting directions on your wax.
- Sea shells, try to get some with deep spaces. I got a pack of six for $2.99 at Hobby Lobby.
- Wax. You can recycle old candles or buy new wax. I like to use palm wax because it's eco-friendly (comes from trees, a natural and renewable resource), it holds its color well, and it doesn't deflate as it cools like some other waxes do. It also has a nifty crystallized pattern as it cools.
- Wicks, metal wick tabs (this keeps the wick from floating up as the candle melts), bamboo skewers or pencils, and plastic bags or small cups to stabilize wobbly shells.
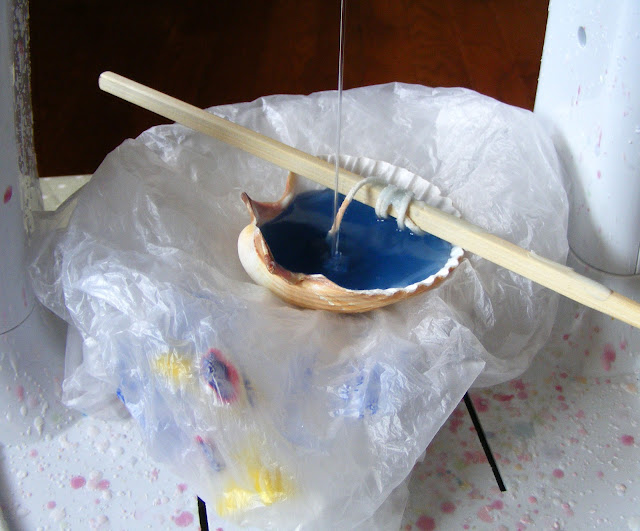
Step one: cut the wicks about four inches long. Use pliers to pinch the wick tabs on the end of the wicks. Tie the other end of the wicks to pencils, chopsticks, or bamboo skewers and lay the pencil (or whatever) over the shell. This keeps the wick hanging straight down. If the wick is too long, just twirl in around the pencil to shorten it. You want the wick tab to just barely touch the bottom, with the wick going fairly straight up and down.
Shells are round on the bottom and they WILL tip over as you fill them. Be warned. I'm a veteran candle-maker and I still made a mess. To try and avoid this, I rested my shells in a little nest made of a plastic bag. You could also rest your shells on a shot glass or bottle cap.
Melt, scent, and color your wax any way you like. Just make sure you buy add-ins that are specially made for candles, not soaps or foods. Bad things happen. Learn from my mistakes. Pour in wax carefully. You can adjust the wicks into position as long as the wax hasn't hardened. Try not to move them, and don't light them, until the wax has completely cooled. Rest them on something, like a bottle cap, as you burn them, to keep them from moving around.
I got the idea for this project from one similar a friend bought me as a gift several years ago. While at the craft store, a different friend told me Martha Stewart has the same DIY on her blog. Although it's not my own original idea, I still wanted to share my adventures in shell-candles with you, but if you want to see how Martha does it, you can do so here.
How are you celebrating the arrival of summer?


Great idea, the coloured wax looks really good.
ReplyDeleteI love anything to do with the beach
I have so many shells at my house!! I'm gonna have to do this! And yay summer!! =D
ReplyDeletewow! Brilliant idea! I am definitely doing that when I get hold of some seashells this summer! :)
ReplyDeletexxx,
Lily
http://lilycupcake.blogspot.co.at/